Formula143 Collector’s Guide
Part 2. Few words about technology. What are models made of?
Part 3. The Brands. What scale models are there and who makes them?
Part 4. The Market. How much do models cost and where to buy them?
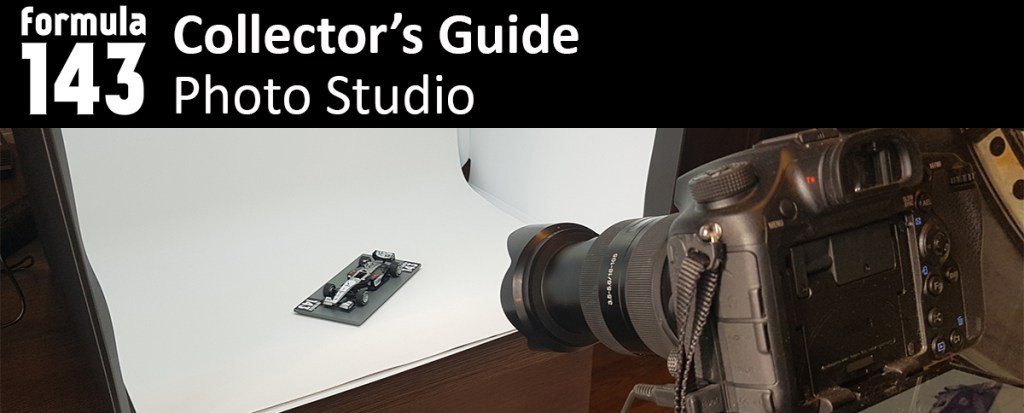
Part 5. Photo Studio. How to make quality photos of scale models?
Part 6. Cabinets and display cases. How to exhibit scale models?
If you decide to put your collection on public display, like me, or for sale, then you cannot avoid the need to take good photos of models.
In this guide I will tell you how I take photos of models from my collection. I am not a professional photographer and my photographs are not perfect. I will only share my own experience and rules, and it is up to you to listen to my opinion or not.
Equipment
At first, what do you need to take pictures of models? There is only one mandatory element of the process – the models themselves. Everything else, even the camera, is optional. You can take pictures even with a phone. But if you want to get really good photos, then the desired set of equipment (except for models, of course) should include:
– camera
– tripod
– camera shutter remote control
– light box, or photo tent – a device for shadowless macro photography, consisting of a closed volume where the subject is placed (for example, a box), and light sources.
Now a little more detail about the equipment.
Camera
It is advisable to have a camera (or a camera + lens kit) that allows you to specify shooting settings manually, and can also work in macro mode. In principle, any modern “soap box” or camera of a good smartphone meets these conditions. But the ideal is a digital SLR with a macro lens. The general rule is that the more specialized the device, the more opportunities for fine-tuning it gives. In photography, this is especially important. I use Sony A99II DSLT (digital single-lens translucent) camera – a professional camera with a semi-transparent mirror and a full-frame sensor. This is one of the best cameras for professional shooting and, accordingly, one of the most expensive. The main purpose of this camera for me is plane spotting and travel photography. For amateur photographing of scale models, the capabilities of this camera are redundant, but since I have it, it would be foolish not to use it. I use the DSLT with the universal Sony DT SAL 16-105 mm lens or sometimes with the Sony SAL 70-300 mm G telephoto lens. These lenses do not have macro mode, but manual settings do without macro.
Tripod
The main purpose of the tripod is to fix the camera in a fixed position. It is important to get clear photos with long exposure. In addition, you need a tripod if you want to get the series of photographs of models under the same conditions – from one angle, from one height.
Camera shutter remote
If you shoot by pressing the shutter button on the camera itself, then you can’t avoid small vibrations of the camera. The remote control allows you to get rid of this. An alternative is a self-timer with a pause of a few seconds. But the remote control is better – it will take much less time for large series of photos than with the self-timer.
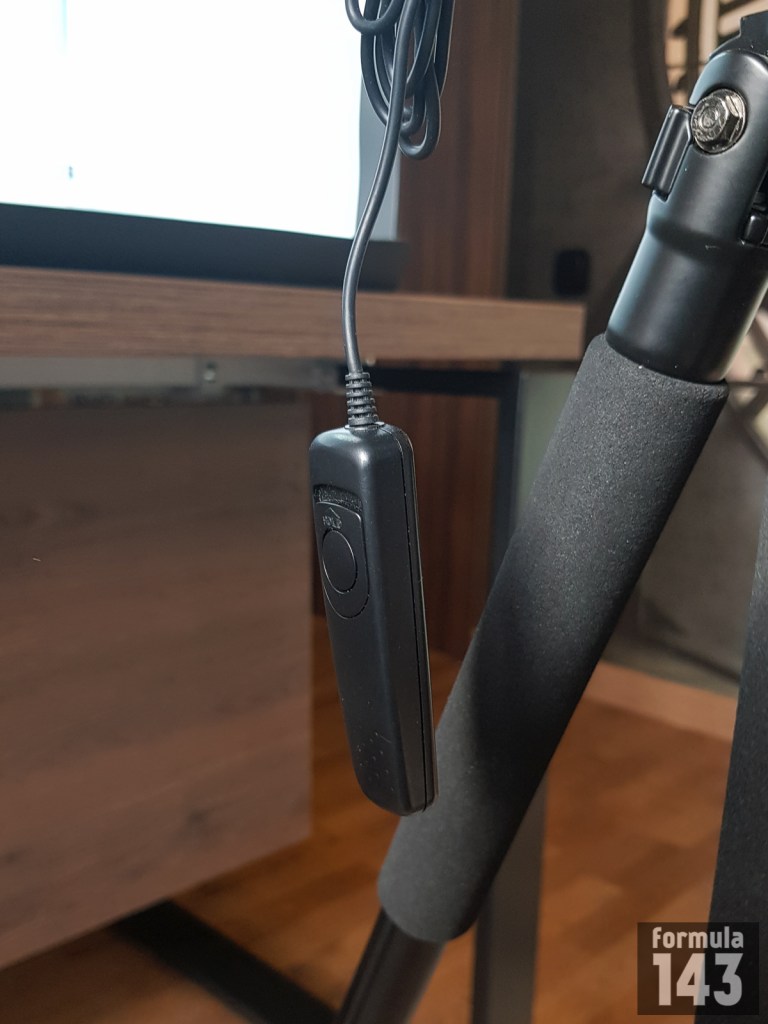
Remote shutter
Light box
How do people usually take pictures of their models? – in daylight, in the light of table lamps, on a windowsill, on a desk, on the street, etc. High-quality photos cannot be guaranted this way. For good photographs of stationary objects, you need even bright diffused light without shadows. Good and constant light conditions are almost impossible to achieve in any other way, except with the help of light box. Therefore, the light box is no less important component of the equipment than the camera. For our purposes it is not necessary to have an expensive box with external lamps. A simple and cheap photo tent with a pair of LED sources is enough.
Photo box consists of a box (cube) with an open front face, a background and light sources. The photo box should be large enough to accommodate the model and leave enough space on all sides so that nothing but the background falls into the frame. It must be at least 2 lamps. With three light sources, the backlight can be from the sides and top, or from the sides and front. With two – from the sides, or from top / front.
In principle, the simplest photo tent, sufficient for our purposes, can be done by yourself, but the market (for example, on eBay) is full of good Chinese options that cost as one scale model of medium quality – $ 20-50.
I use cheap portable SlowBeat lightbox. Size of the box is 60 x 40 x 40 cm. The set includes two backgrounds (white and black) and two LED lamps powered via USB. The whole set easily folds into a flat case, which is also included in the kit.
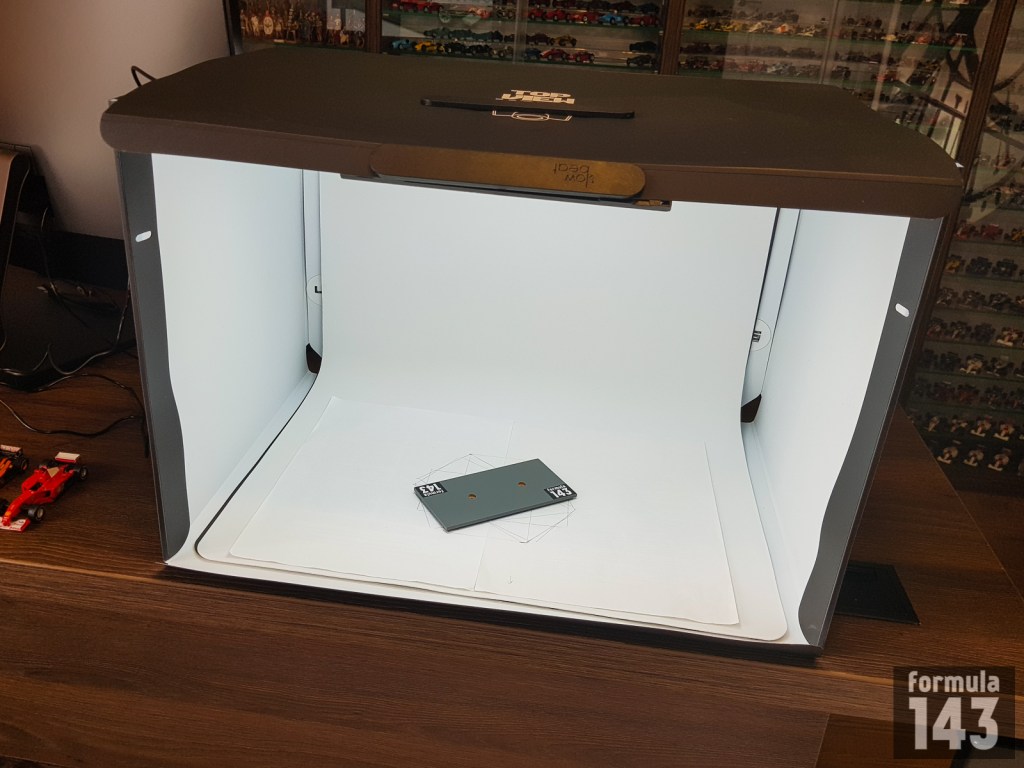
SlowBeat Portable Light Box
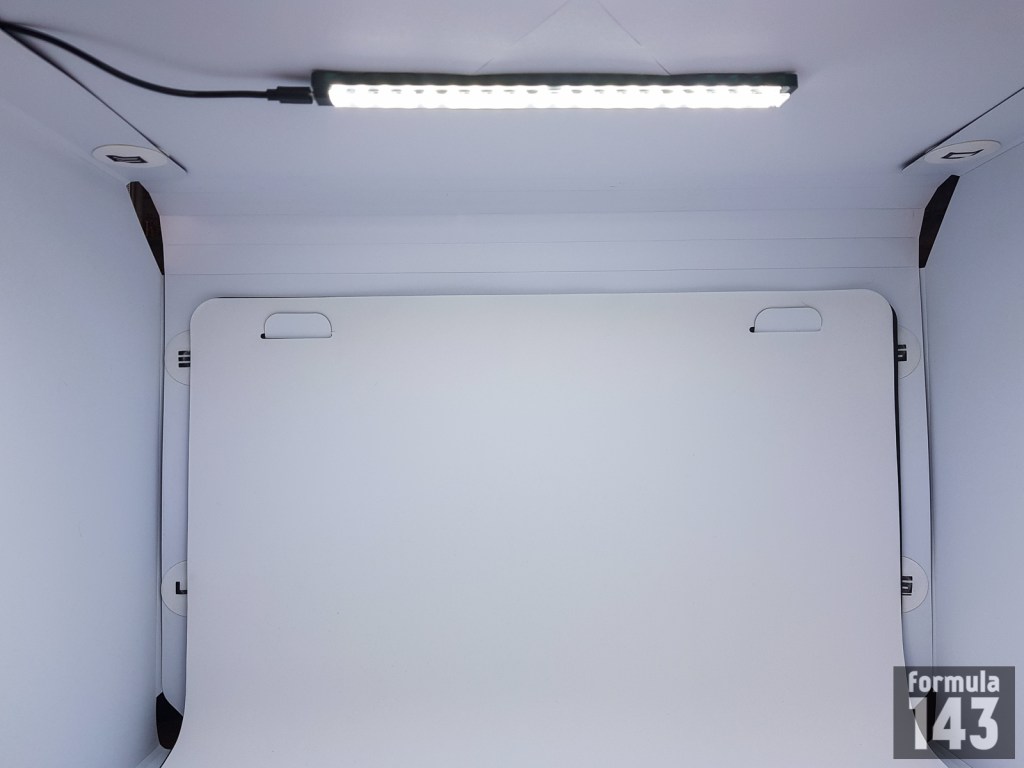
LED lamp at the top

Model in the light box
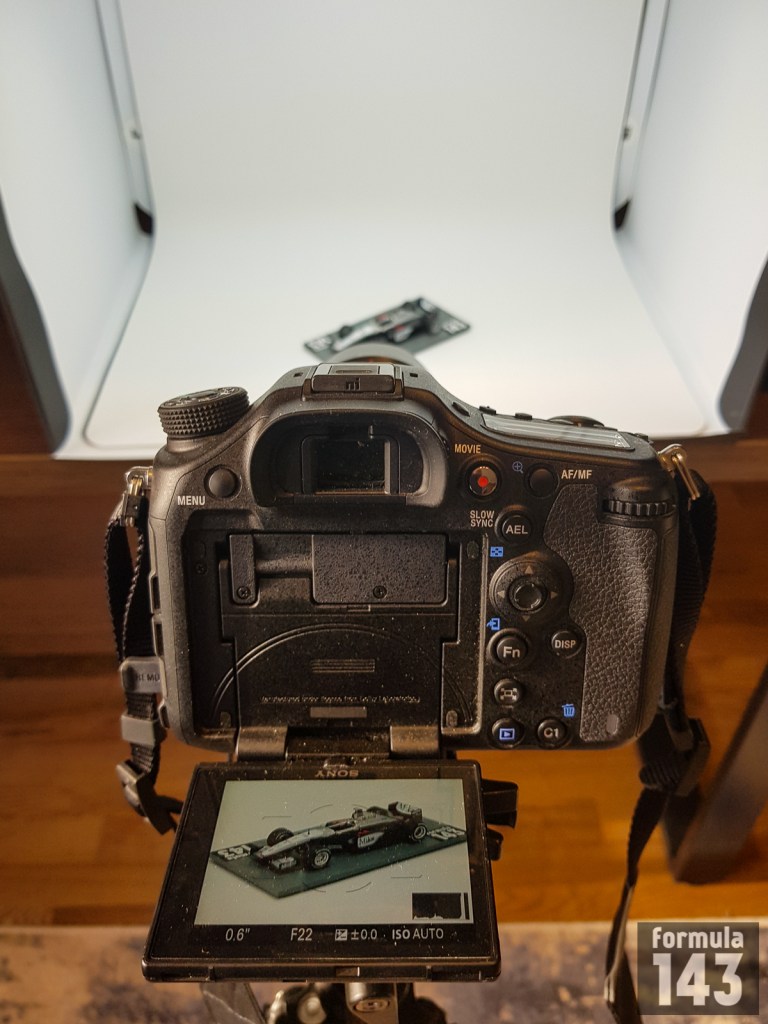
My kit, which was used to take all the models’ photos on this site, includes the following equipment:
DSLT Camera Sony A99II
Sony DT SAL 16-105 mm and Sony SAL 70-300 mm G lenses
Benro A-300EX Tripod
Remote Shutter (unknown manufacturer)
SlowBeat Portable Photo Studio light box with two LED lamps with color temperature of 6400K
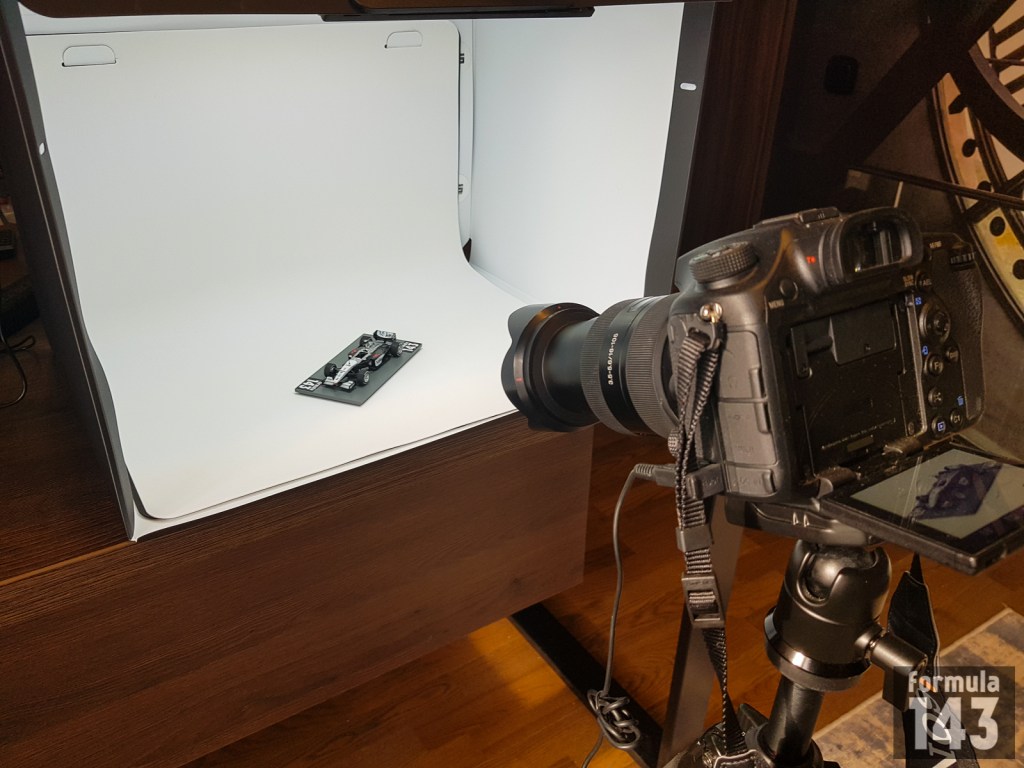
My eqiuipmet at work
Shooting process
When everything you need is collected, you can begin the photo session of your models. To do this, prepare models; choose the angles in which you will take them; set up the camera; take photos, process and save them.
Model Preparation
I prefer to exhibit and photograph models without boxes. Before the photo shoot, it is worth putting the model in order – remove dust, check and, if necessary, correct and glue small elements – wheels, antennas, mirrors, etc. To remove dust from the models, I use a small brush and a photo bulb to clean the lens – it blows dust well from places inaccessible to the brush. It is convenient to photograph models in small series. As a rule, I prepare a series of 10 models.
Angle selection
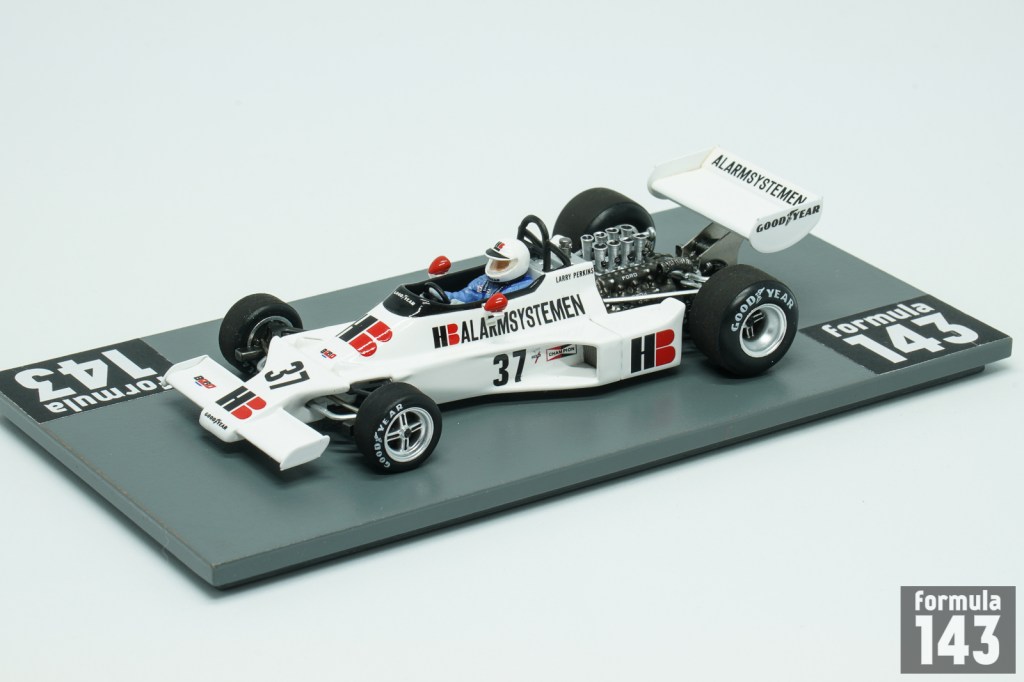
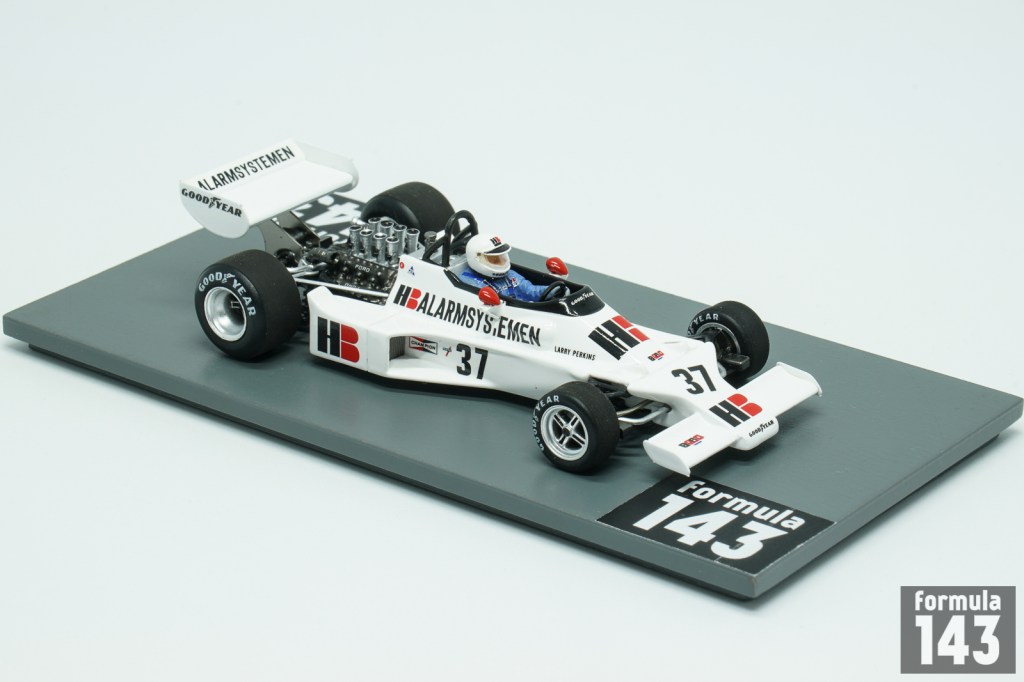
The choice of the most photogenic angle is very important for the aesthetics of photography. In order to understand how professionals take pictures of scale models and choose the camera angles you like, it’s worth looking at the sites of large model manufacturing companies or stores. Everyone can have their own preferences, but the rules of photo composition worked out over the years say that the best angle for photographing objects is 3/4. Such an image allows you to get the most complete picture of the subject from one photograph. And the vast majority of professional sites use 3/4 in the front as the main angle. I also use 3/4 left front as an angle for the main photo of each model.
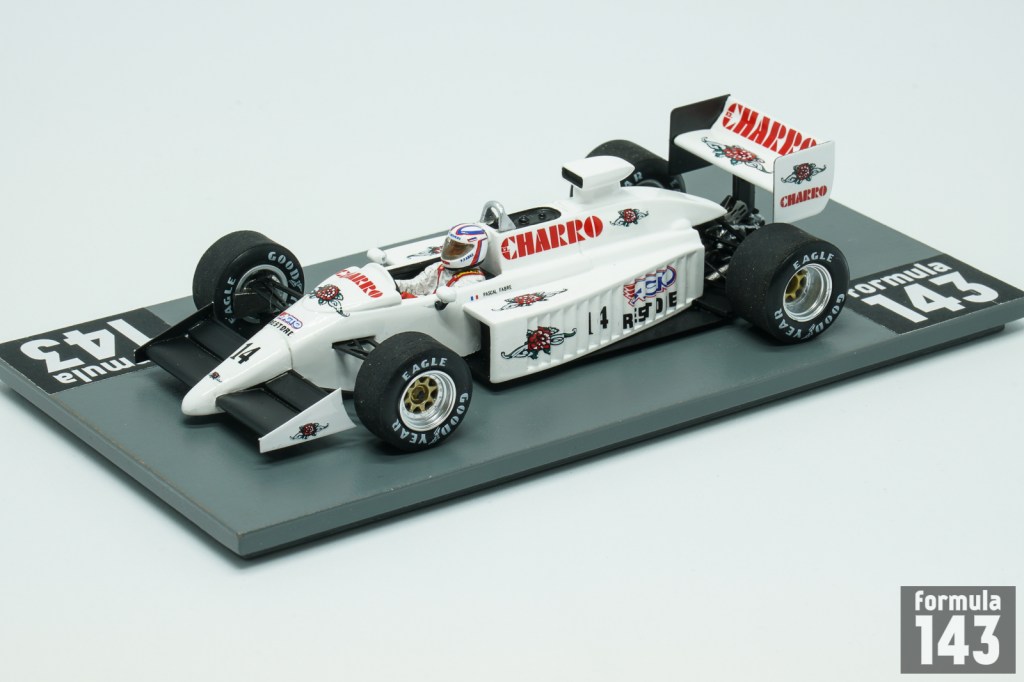
Photo at 3/4 left front angle
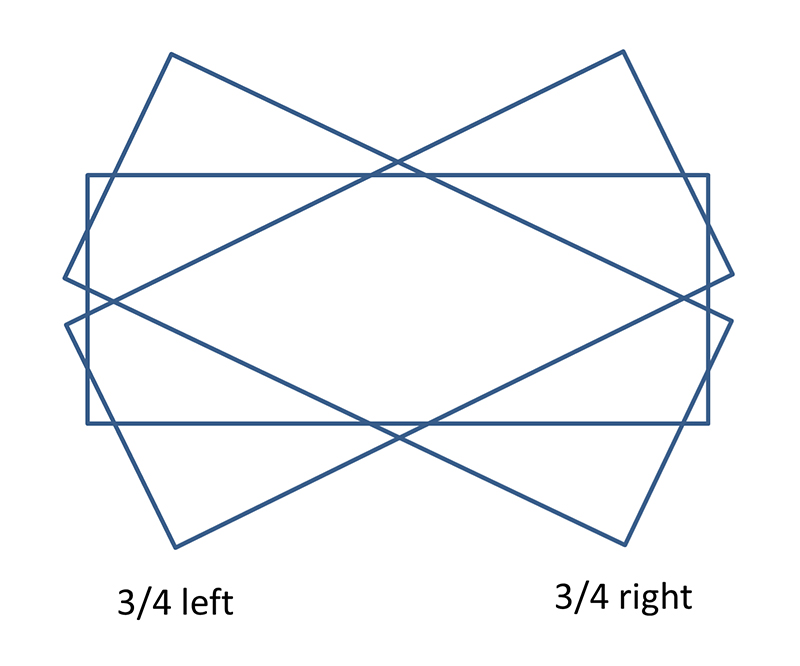
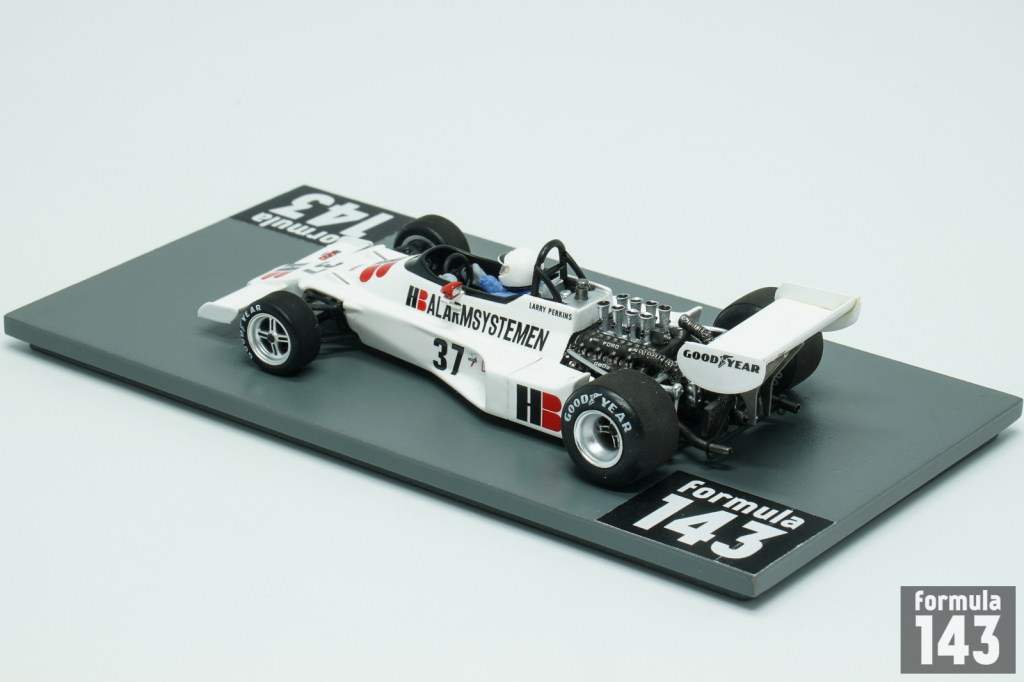
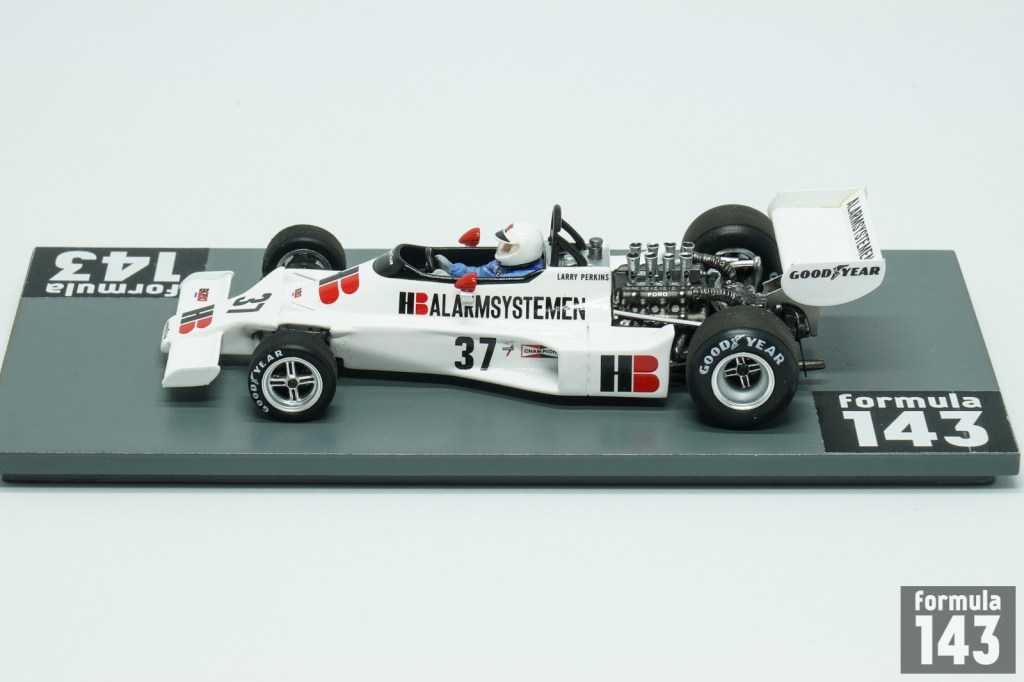
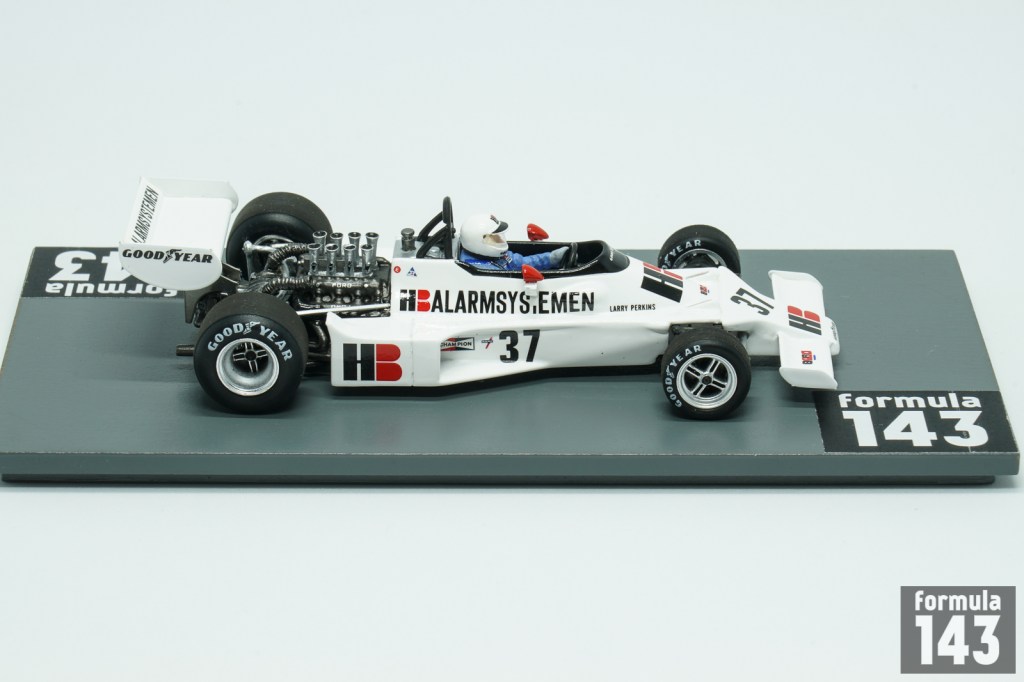
But one angle is not enough to see all the details. I take 6 photos of each model from different angles:
3/4 left front
3/4 left rear
3/4 right front
3/4 right rear
Left side view
Right side view
Here is a diagram of my angles:
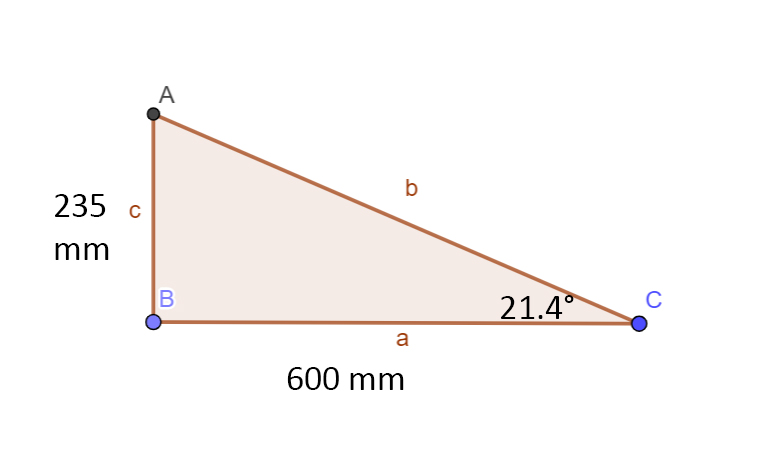
In addition, models look more advantageous if photographed a little from above. My aesthetic feeling suggests that the optimal camera angle should be in the range of 20-25%. If you install the camera at lower vertical angle, the details on the upper surface of the body and the details of the cockpit will be poorly seen in the photo. If the camera is higher, the view will resemble a top view.
Here is my approximate scheme of camera and model positions. Point A is the center of the camera matrix. Point C is the center of the model. I put the camera so that the matrix is approximately 60 cm from the center of focus (center of the model) horizontally and 23-24 cm higher. This gives a vertical angle of about 21.5 degrees.
In order the model does not look lost on a light background, I photograph the models on a stand. In addition, photos of different models on the same stand in the same perspectives provide a systematic order to the collection and allow you to correlate the size of the models. I use several customized stands of the same size with the logo of my collection.
Before starting the shooting, I align the stand according to the angle scheme drawn on paper, then remove the paper and photograph the model.
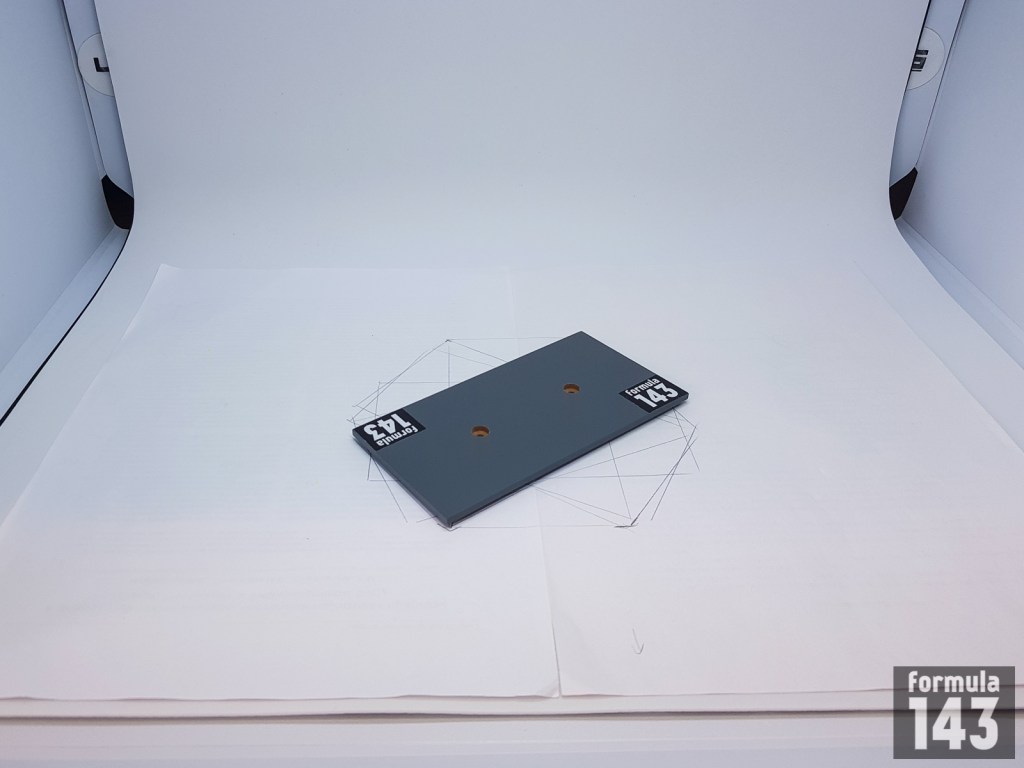
Model stand at angles scheme
I arrange the frame in such a way that the stand fits completely into the frame, but there are no empty places (extra background) outside the stand. So in the photo you can see the whole model with enough free space for perception. In addition, the correct cropping at the time of shooting (which is easy to achieve in stationary conditions) will save you from spending time cropping photos during processing.

The following series of photographs of each model is the result (click on the picture to enlarge):

Camera settings
Of course, the exact settings depend on the camera model and on the lighting conditions. General recommendations are that the best quality photographs are taken with a small aperture and long exposure. To avoid noise, it is better to set the photosensitivity in the range of 100 – 200 ISO units. In order to get the most natural colors, you need to set the white balance on the camera, exactly corresponding to the color temperature of the lamps. Avoid using the flash if your light box lamps are not in sync with it. Correct focus mode is crucial. You need to try different modes of automatic and manual focus to select the optimal mode for your equipment and shooting conditions. In general terms, for our purposes a wide focus area is better than a point focus , automatic focusing is easier than manual. In my case, automatic zonal focusing is optimal.
My preferred settings for the Sony A99II are as follows:
File mode: JPEG with maximum quality
Dimensions: 6000 x 4000 pixels
ISO: 100
White Balance: 6400K
Aperture: f / 22
Exposure time: 0.6 sec
Focal Length: 90 mm
Zonal AF
Processing and storage of photos
Photos processing
I try to reduce the need for computer processing of scale model photos to a minimum, achieving the required quality by selecting the shooting conditions, since photographing a stationary object in permanent conditions is an ideal situation for this. For example, photographs of aircraft in motion (planespotting) require serious post-processing, in order to get the best quality result. However, minimal intervention is necessary.
If possible, professional photographers advise saving files in RAW mode. However, if you are not going to seriously edit them, then just select JPEG with maximum quality. It is better to select the optimal shooting conditions and save in JPEG, so that later you save time on editing and disk space.
To process photos I use the Adobe Lightroom 5. This is a powerful software with all the necessary tools that allows you to process photos in batch mode. What I do and what I don’t do in Lightroom in case of scale models’ photos:
Removing spots from dust on the matrix – if needed.
Crop – not necessary if the frame is aligned correctly when shooting.
Changing white balance, adjusting exposure, brightness, contrast, colors – also, as a rule, is not required.
Clarity, vibrance, and saturation correction may be required for some photos — for example, light models against a light background. In this case I try not to overdo and shift the adjustment sliders by no more than 10-15%.
Resizing photos and watermarking – yes.
Saving photos
I always keep the original full-size copy of the photo without a logo.
For uploading to the website, I additionally save a photo with a logo (watermark) of my collection in the size of 1600 x 1067. I use the following file saving options for the website photos:
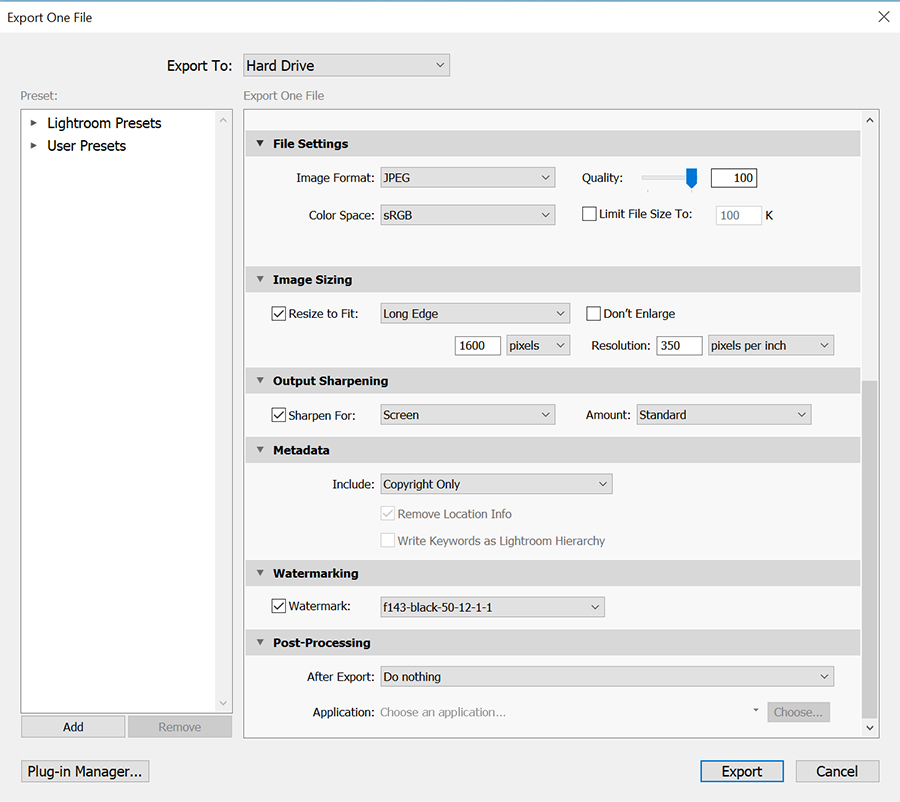
Image Format: JPEG
Quality – 100%
Color Space: sRGB
Resolution: 350 dpi
Sharpness: for display on the screen
The file size with these settings is approximately 700 – 800 kb, which is quite normal for a website.
Photo storage
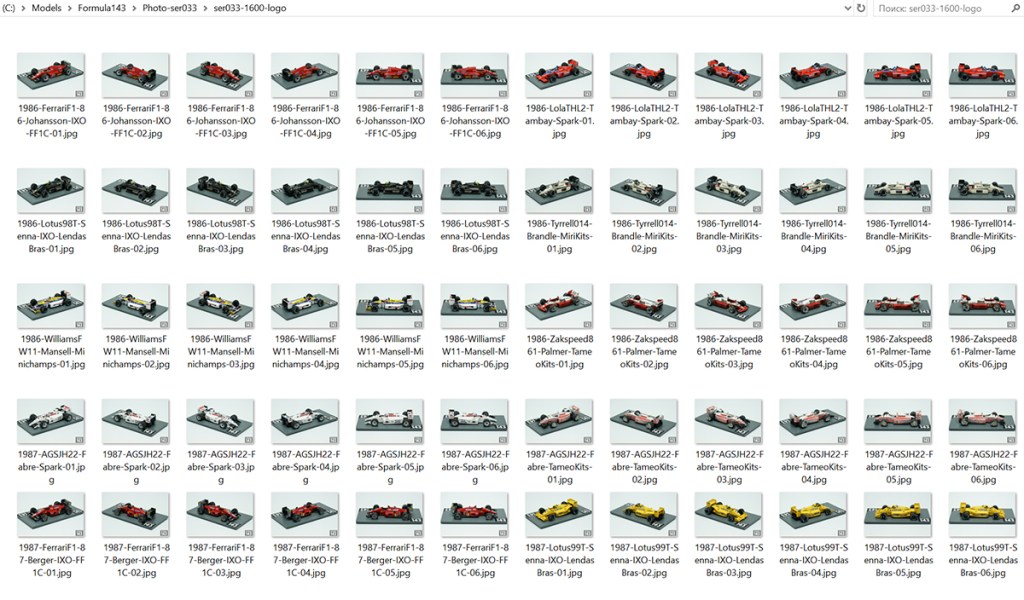
I sign photos of the models for uploading to the website according the following scheme: year-car-model-driver-manufacturer-photo number. The original photos I leave with the original file names. I keep photos from each photo session in separate folders, numbered in order. Moreover, the procedure for photographing and uploading to the site does not coincide with the sequence of acquisition of the models. This is the folder of one of the photo sessions:
When the disk space taken by photos reaches a certain limit, in order not to overload the computer’s hard drive, I transfer the photos to a network attached storage (NAS). NAS is included in my home network and allows me to store data (including photos) in a safe mode. My NAS consists of four high-capacity hard drives that are integrated into RAID arrays with the ability to recover data from a failure.
That’s all. Photos of the models are taken, processed, saved and ready for upload to the website.
Enjoy! Stay tuned and subscribe to Formula143 – the best F1 and Grand Prix scale models collection on the net.
